|
Happy Halloween! For this week's devlog I figured I would write the third installment of "Things I Use To Make This Game". Find the first installment here, and the second here. I have really enjoyed highlighting the tools that make my game development life easier, and hopefully it helps other devs too. Kenney Nature Pack. I'd be surprised to learn of a game dev who hasn't seen that great work Kenney is doing, making free game art for anybody to use. As I move forward with locking in the visual aesthetic of Monumental Failure, having a bunch of low poly nature models ready to go is super valuable! 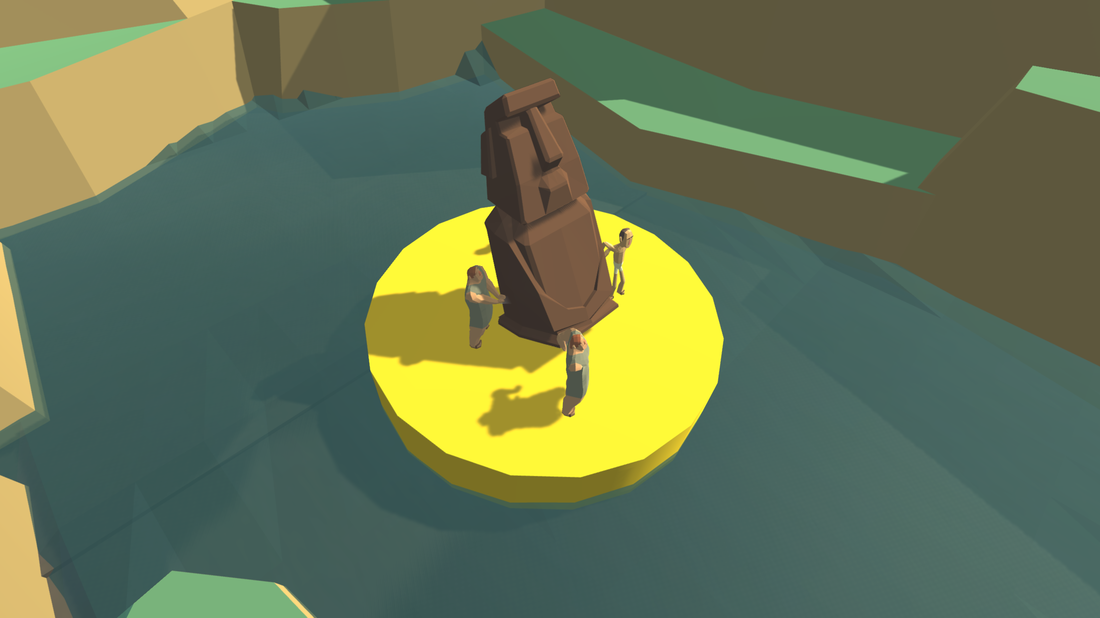 Thanks for the rocks! Unity3D - Simple Finite State Machine (C#). Finite state machines are extremely useful tools in game development, and a fundamental idea in computer science. It's with great irony that most programming languages don't easily represent state machines. Simple FSM does all the hard work, and you're left with a state machine that follows the same patterns of a standard Unity Monobehaviour. If you're a Unity programmer and need a finite state machine, this is the solution.
Probuilder. Probuilder is a mesh editor that runs inside Unity. Most of Monumental Failure has been prototyped using cubes and cylinders and every other basic shape built in to Unity. Probuilder let's me construct a mesh right on top of my prototypes, right in Unity. Very useful! That's it for today. Maybe you can use one of these tools in your own project. Thanks for reading. -Spencer
0 Comments
Last night Monumental Failure passed a significant milestone -- all the levels that will be included in the initial release are now done! Well, sort of... I still have several passes of game play and graphical polish to do, but none the less, we're getting there! Today I'm going to discuss some ideas that initially didn't work, and the solutions I found to make those bad ideas good.  I was inspired by the design from this Mario Party 2 mini-game to challenge the player to stay on top of a cylinder. The constant shuffle and adjustment left and right should be an interesting challenge. Well, unfortunately for our physics driven game, once you started to tip a little bit, it wasn't long before you tipped a lot. Loss was too sudden. The solution? Conveyor belts, alternating between pushing you left and right meant you had to readjust, and if you got pushed all the way off, well, you probably saw it coming.  Much better :D I had designed this crazy crane vehicle to be used in the Bayon Temple level, and for a long time it was one of the most confusing and glitchiest aspects of the game. At the start, the characters were physics objects standing within the vehicle. While it seems like physics objects would be in the spirit with the rest of the game, the result was that your character couldn't consistently press the buttons to make the vehicle go, and worse, they could get bounced right out of the vehicle. Oops! The solution was to simply make the characters part of the vehicle, rather than making them physics objects. 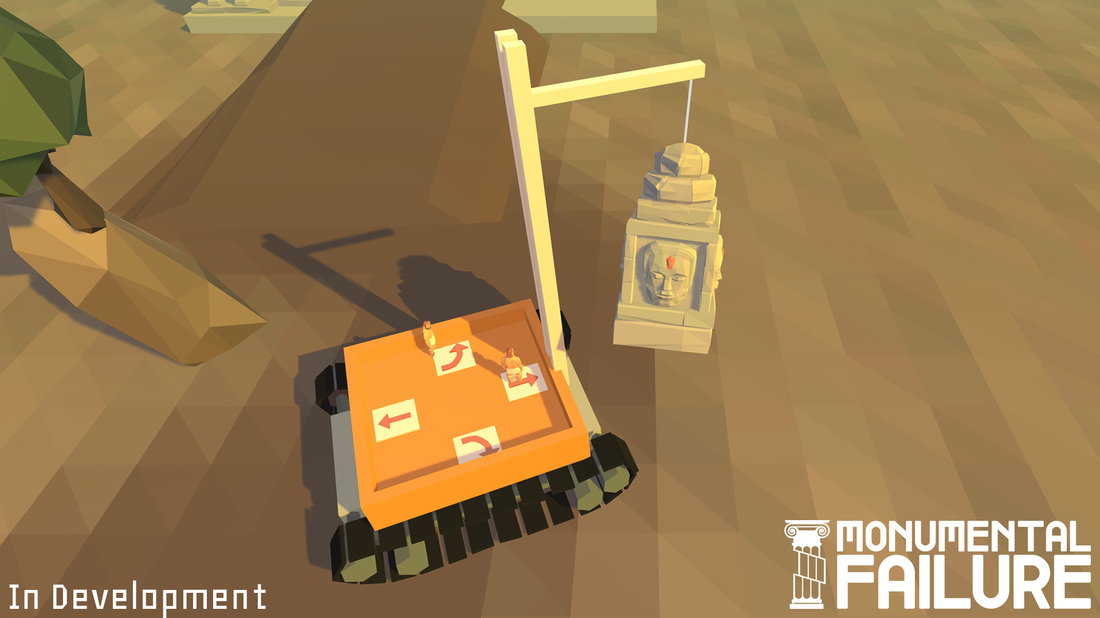 When building the pyramid, you will have to traverse some crumbly stone columns that tip over, that ultimately help you get to your destination. The initial prototype used some green cylinders to represent these tipping platforms. When Jess tested them out, she didn't realise they were tipping and attempted to hop from one to another, and it didn't work and she was frustrated by it. The solution here was to better visualise that something was happening. Green cylinders got replaced with craggy, wiggling rocks. Particle systems create dust when the tipping starts. Crumbling sounds play, ending with a good thud when the tipping is done. The behaviour was then obvious. 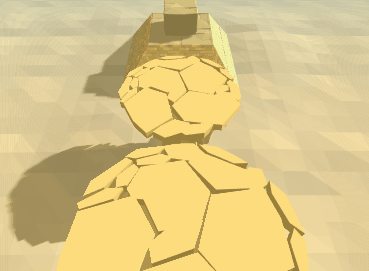 Those are just a few of the tweaks I've made up till now, and like I mentioned above, there's bound to be a few more. Given that the level design is inherently antagonistic to the player, it's important that the challenge is clearly communicated, and that failure clearly feels like a fault of the player. Simply put, I need to create a fair game.
Thanks for reading, Spencer The design of Monumental Failure is hugely influenced by the design philosophies of local multiplayer games. That doesn't mean it's exclusively multiplayer, you can play it solo, no problemo! But, let's say you have some friends over, maybe you'll have more fun if you split the screen and fail together! Anyways, one of the design ideas we are appropriating is character customization. In a multiplayer game, getting the player to customize and familiarize themselves with their characters imbues an immediate connection with their characters. This is especially helpful to combat the "I was looking at the wrong character/screen" problem people often experience with local multiplayer games. 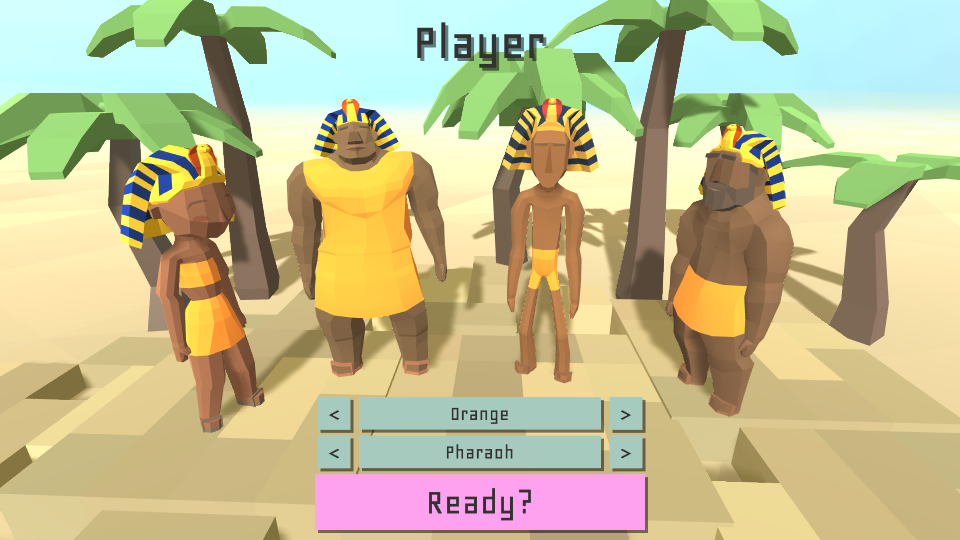 When I started working on implementing character customization I wasn't sure how I would introduce the user interface required to allow the player to set their customization. I started with examining what the player could be customizing. We have 4 different character bodies, and while it would be possible to let the player pick which one to use, I use the different body types to help clarify gameplay elements within the levels. This means the player won't choose body type and will instead be customizing the whole "team" of characters. The characters have three attributes that can be swapped around, their skin color, their clothes color, and their hat. It felt important to us that the characters' skin colour stay relevant to the culture they are representing. That leaves us with just the hat and clothes colour to customize. 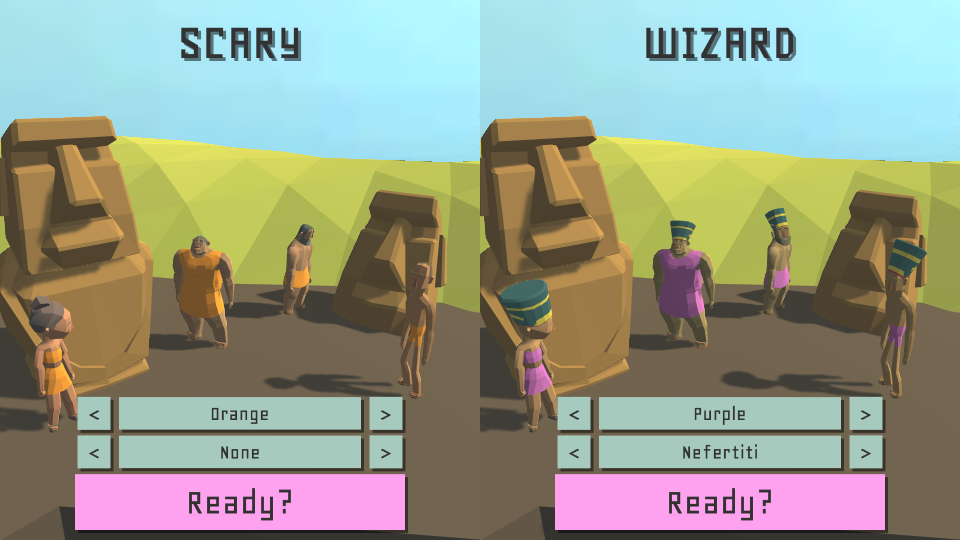 Conventional wisdom would suggest that character customisation happens right around the time a player "presses START to join". This doesn't really make sense for Monumental Failure. Loading four characters in to a menu would make for a pretty crowded user interface. Additionally, not knowing your characters skin tone until you load a level would provide ambiguity to the characters finalised look. Not ideal for would-be fashionistas. This implies that character customization should happen after the level has been chosen, and if the screenshots haven't made it obvious, that's exactly what I did! This provided the additional benefit of having a pleasant character vignette to introduce each level, and even better, introduced a "Ready Up" feature. When the level loads, you have to press a button to start instead of being thrust immediately in to the gameplay. Honestly, that sounds like something I should have introduced a while ago :-P 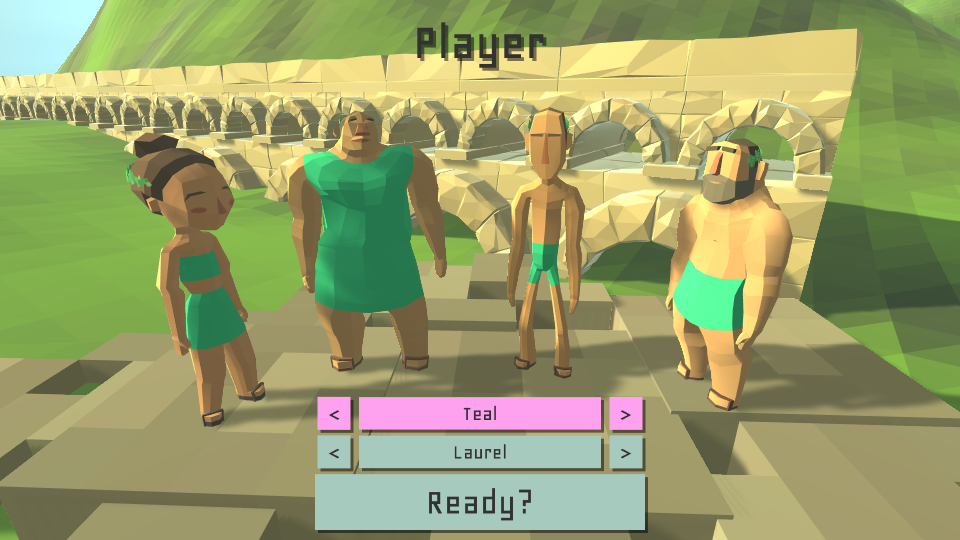 I always find it to be a rewarding experience when the solution to a design problem is arrived on by this kind of deduction. Using design constraints and philosophies brought me to a unique solution for Monumental Failure's customization problem. A solution with benefits greater than the problem it solves.
Thanks for reading, Spencer  One of the challenges you'll navigate in Monumental Failure is steering characters who have roll around on giant balls. In this blog post, I'm going to walk through the implementation of such a character with a specific focus on how to correlate the character's speed to the ball's rotation. Let's take a look at the final product first. 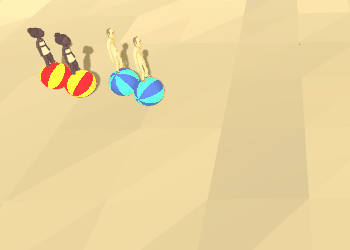 In Monumental Failure, the characters a typically composed from a single rigidbody and a few primitive colliders to represent their physical form. In the case of the ball riders, they are represented by a capsule for the human, and a sphere for the ball. The animated components, the human and the ball, are rotated as child objects while the parent rigidbody has a frozen rotation. 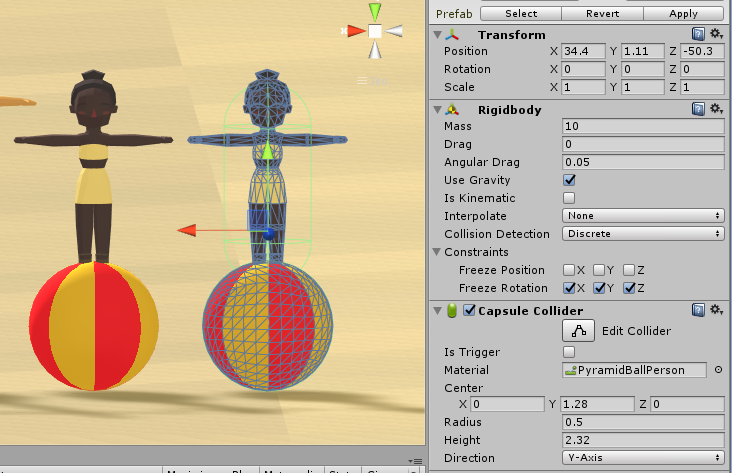 Composition of a character. When we animate this character, the result should be as follows: the character faces forward, the ball rolls forward, and the character walks backwards, implying they are rolling the ball forward. Facing the character the right way and getting them to walk backwards are trivial problems already implemented in other levels. It took me a bit of trouble to figure out what was the best method to rotate the ball graphics object (remember it is a child of the top level rigidbody). The best way was simply Transform.Rotate, passing Space.World as the relativeTo parameter. The code is something like: public GameObject sphere; And the result is: 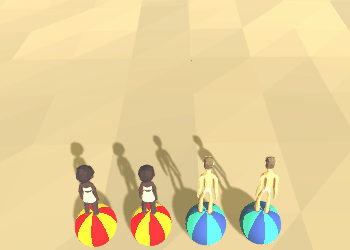 Not bad right? Take a closer look though, a little slidey maybe? Hmmmm. Be suspicious of my code above, I'm rotating stuff in FixedUpdate and not using Time.fixedDeltaTime. Something must be amiss! At this point we've simply got lucky that our character's speed was close to the amount we need to rotate by, but it's not accurate! 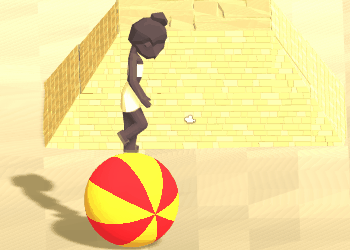 I'll illustrate that point with a character bigger than a pyramid! We can do better! What we want to do is exactly correlate the character's speed to the rotation of the ball. If we multiply the character's velocity by the fixed delta time, we will get how far the character has traveled in the last frame. To correlate that distance to an amount of rotation, we simply use the circumference of the sphere to figure out how many degrees we need to rotate per unit moved. For example, if our circle has a circumference of 4 units, and our character has moved 1 unit, we would rotate 90 degrees. Easy! public GameObject sphere; 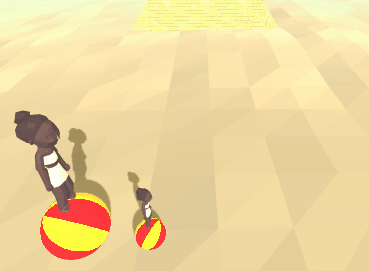 Voila! Not bad eh? I hope this bit of behind the scenes tech talk was interesting, or maybe even helpful!
Thanks for reading, Spencer |
Archives
March 2017
Categories |
 RSS Feed
